Drywall installation is a versatile and efficient method for creating smooth walls and ceilings․ This guide provides step-by-step instructions for a successful drywall project, ensuring professional results․
What is Drywall?
Drywall, also known as plasterboard, is a construction material made of gypsum plaster sandwiched between two layers of paper․ It is widely used for walls and ceilings due to its fire-resistant properties, soundproofing capabilities, and ease of installation․ Drywall panels come in various sizes and types, each suited for different applications․
Benefits of Using Drywall
Drywall offers numerous advantages, including cost-effectiveness, ease of installation, and versatility․ It provides excellent fire resistance, sound reduction, and a smooth surface for painting․ Drywall is also lightweight, making it easier to handle and install compared to traditional plaster, while still delivering durable results for both residential and commercial projects․

Importance of Proper Installation
Proper drywall installation ensures structural integrity, prevents costly repairs, and enhances aesthetic appeal․ Incorrect techniques can lead to cracks, uneven surfaces, and compromised fire resistance․ A well-executed installation guarantees durability, safety, and a professional finish, making it essential to follow established methods and best practices throughout the process․

Materials and Tools Needed for Drywall Installation
Drywall installation requires drywall sheets, screws, drills, measuring tools, joint compound, tape, and safety gear․ Gather all necessary materials and tools before starting the project․
Types of Drywall
Drywall comes in various types, including standard, fire-rated, moisture-resistant, and soundproofing options․ Each type serves specific needs, such as durability in high-traffic areas or protection against mold and mildew in bathrooms and kitchens․ Choosing the right drywall ensures optimal performance and longevity for your project․
Essential Tools for the Job
Key tools for drywall installation include a utility knife, drill, screwdriver, measuring tape, pencil, drywall saw, and mud pan․ These tools help measure, cut, and secure drywall efficiently․ A ladder or lift is also necessary for reaching high areas․ Proper tools ensure precise cuts and a professional finish, making the installation process smoother․
Additional Materials Required
Essential materials include joint tape, drywall compound, screws, nails, and drywall anchors․ Safety gear like goggles and a dust mask are crucial․ Sandpaper and a vacuum are needed for finishing․ These materials ensure a secure, smooth, and safe installation process, helping achieve professional-grade results for your drywall project․
Preparation of the Workspace
Clear the area, cover floors, and ensure proper ventilation․ Gather tools and materials, and inspect the space for obstacles to ensure a smooth installation process․
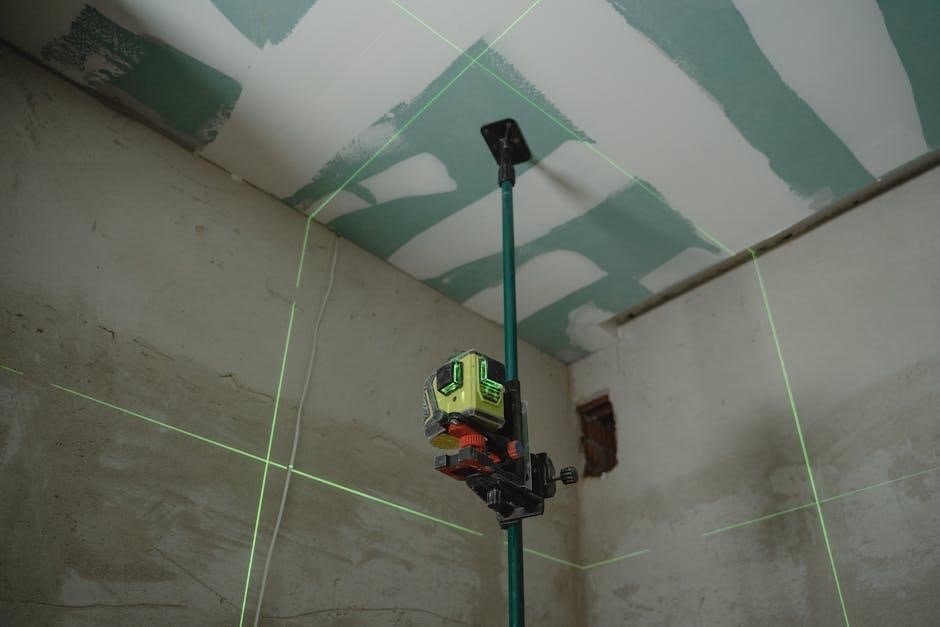
Measuring the Walls and Ceiling
Measure wall lengths and ceiling heights to calculate the square footage․ Note any obstructions, such as windows or doors․ Mark the locations of wall studs to plan drywall placement accurately․ Use a tape measure and laser level for precise results․ Double-check measurements to avoid errors during installation․
Cleaning and Clearing the Area
Clear the workspace of furniture, fixtures, and debris to ensure unobstructed access․ Cover floors and remaining items with drop cloths or plastic sheeting․ Remove any nails or screws from walls․ Vacuum the area to eliminate dust and dirt․ Ensure the space is clean and dry for optimal drywall installation conditions․
Ensuring Proper Ventilation
Ensure proper ventilation by opening windows and using fans to circulate air․ This prevents dust from settling and reduces the risk of inhaling airborne particles․ Adequate ventilation also helps prevent moisture buildup, which can lead to mold or warping․ A well-ventilated workspace is essential for a safe and successful drywall installation process․
Drywall Installation Steps

Measure and cut drywall sheets to fit walls and ceilings․ Hang them securely, ensuring proper alignment․ Use screws or nails to fasten, creating a smooth surface for finishing․
Measuring and Cutting Drywall Sheets
Measure walls and ceilings to determine the number of drywall sheets required․ Calculate the square footage to ensure sufficient material․ Mark the drywall with a pencil for precise cuts․ Score the sheet with a utility knife and break it along the line․ For curved cuts, use a jigsaw or drywall saw․ Proper cutting ensures a seamless installation․
Hanging Drywall on Walls and Ceiling
Start by hanging drywall on the ceiling for better stability, using a drywall lifter to handle heavy sheets․ Align the drywall with wall studs and ceiling joists, ensuring proper fit․ Secure the sheets with drywall screws, spacing them 6-8 inches apart․ For walls, begin at the bottom and work upward, leaving a 1/4-inch gap at the floor for expansion․ This ensures a sturdy and even installation․
Securing Drywall with Screws and Nails
Use drywall screws for consistent holding power, spacing them 6-8 inches apart on edges and 10-12 inches in the field․ For added strength, drywall nails can be used, ensuring they are countersunk․ Avoid over-tightening to prevent the drywall from cracking․ Make sure all fasteners are flush with the surface for a smooth finish and to avoid bulges․

Taping and Mudding
Taping and mudding are essential for a smooth drywall finish․ Apply joint tape to seams, then spread compound smoothly․ Let it dry before sanding for a seamless look․
Applying Joint Tape
Apply joint tape to all drywall seams, ensuring it is centered and pressed firmly․ Use a taping knife to embed the tape into the compound, creating a smooth bond․ This step is crucial for preventing cracks and ensuring a seamless finish․ Proper alignment and firm pressure are essential for effective adhesion and durability․
Spreading and Smoothing Compound
Spread a thin layer of joint compound over the taped seams using a wide taping knife․ Hold the knife at a 45-degree angle for even coverage․ Smooth the compound firmly, feathering edges outward for a seamless blend․ Allow the compound to dry completely before sanding for a polished finish․ Proper technique ensures a professional result․
Sanding for a Smooth Finish
Sand the dried compound using a sanding sponge or drywall sander, starting with medium-grit sandpaper․ Work in small, circular motions to feather edges and smooth seams․ Switch to fine-grit sandpaper for a final pass․ Vacuum dust thoroughly and wipe the surface with a damp cloth to remove residue․ Repeat if needed for a flawless finish before painting․

Finishing Touches
Inspect for imperfections, apply paint or finishes, and ensure a polished appearance․ Proper cleanup and final inspections guarantee a professional-quality drywall installation․
Painting the Drywall
After the drywall is taped, mudded, and sanded, apply a coat of primer and paint․ Use a high-quality roller for large areas and a brush for edges․ Ensure the surface is clean and dry before painting․ Choose paint suitable for drywall to achieve a smooth, even finish․ Allow the paint to dry completely between coats․
Inspecting for Imperfections
Examine the drywall for cracks, uneven surfaces, or nail pops․ Use a flashlight to highlight imperfections․ Check seams for proper taping and mudding․ Ensure all joints are smooth and invisible․ Address any issues before painting to achieve a flawless finish․ Proper inspection ensures durability and a professional appearance․
Final Cleanup
Final cleanup is essential for completing a drywall project․ Start by clearing debris and dust from the workspace․ Use a vacuum cleaner to remove drywall dust from surfaces․ Ensure all tools and materials are removed from the area․ Inspect the space to ensure it’s clean and free of imperfections․ Proper cleanup ensures safety and prepares the area for painting or further work․

Common Mistakes to Avoid
- Incorrect measurements can lead to poorly fitting drywall sheets․
- Improper fastening techniques may cause screws to protrude or create uneven surfaces․
- Inadequate taping and mudding can result in visible seams and weak joints․
Incorrect Measurements
Incorrect measurements are a common mistake in drywall installation, leading to ill-fitting sheets and wasted material․ Measure walls and ceilings carefully, ensuring accuracy to avoid gaps or overlaps․ Double-check calculations for square footage to prevent ordering excess drywall․ Inaccurate measurements can also result in uneven finishes, requiring additional repairs and extending project timelines․
Improper Fastening Techniques
Improper fastening techniques can lead to weak drywall structures, causing cracks and sagging․ Using too few screws or nails, spacing them unevenly, or overtightening can damage the drywall․ Always follow manufacturer guidelines for screw spacing and depth to ensure a secure and durable installation, preventing future repairs and maintaining structural integrity․
Inadequate Taping and Mudding
Inadequate taping and mudding can result in visible seams and uneven surfaces․ Proper application requires pressing tape firmly into joints and applying compound smoothly․ Insufficient drying time or using too little mud can weaken the bond, leading to cracks and peeling, which compromise the finish and require costly repairs to fix properly later․
Safety Tips and Precautions
Always wear gloves, goggles, and a dust mask․ Handle power tools with care and ensure proper ventilation to prevent dust inhalation, reducing health risks during installation․
Wearing Protective Gear
Always wear gloves to prevent cuts, goggles to protect eyes from debris, and a dust mask to reduce inhalation of drywall dust․ A hard hat is essential for overhead work․ Proper protective gear minimizes injury risks and ensures a safe working environment throughout the installation process․ Safety should never be compromised․
Handling Power Tools Safely
Always follow manufacturer guidelines when using power tools․ Ensure proper grip and balance to maintain control․ Keep loose clothing tied back and avoid distractions․ Regularly inspect tools for damage and wear․ Store tools securely when not in use․ Proper safety practices prevent accidents and ensure efficient drywall installation․
Preventing Dust Inhalation
Preventing dust inhalation is crucial during drywall installation․ Always wear a dust mask rated for fine particles․ Use a vacuum with a HEPA filter to minimize airborne dust․ Ensure good ventilation by opening windows or using fans․ Regularly clean the work area to reduce dust accumulation, protecting your health throughout the project․
Successful drywall installation requires careful planning and attention to detail․ By following this guide, you can achieve professional results and enjoy a smooth, durable finish for years to come․
Final Inspection and Satisfaction
After completing the installation, conduct a thorough inspection to ensure all surfaces are smooth and crack-free․ Verify measurements and finishes meet quality standards․ Address any imperfections promptly to achieve client satisfaction․ Proper curing and final checks ensure durability and a professional finish, guaranteeing long-term structural integrity and aesthetic appeal for the completed project․
Maintenance Tips for Drywall
Regularly inspect drywall for cracks or moisture damage․ Address minor issues promptly with spackling compound and sanding․ Maintain humidity levels to prevent mold growth․ Avoid placing heavy objects near corners or edges․ Clean surfaces with damp cloths to keep drywall looking fresh and extend its lifespan․ Proper care ensures durability and maintains the appearance of your walls and ceilings․
Next Steps After Installation
After installing drywall, allow the compound to dry completely before sanding․ Once sanded, vacuum the area to remove dust․ Apply a primer and paint according to your preference․ Install trim and molding to cover edges․ Finally, inspect the entire installation for any imperfections or touch-ups needed to achieve a polished finish․